Permission roles and team management
How permissions work
Each permission role defines two things:
Feature access levels - for each area of the platform, you set one of three levels:
Edit - full read and write access to the feature.
View - read-only access. The user can see the data but can't make changes.
Hide - the feature is completely hidden from the user's navigation and interface.
Capabilities - granular controls for specific actions:
Manage notes
Manage tasks
Manage tags
Manage sensitive data
Manage rollover
Delete enrollments
Delete employments
Built-in roles
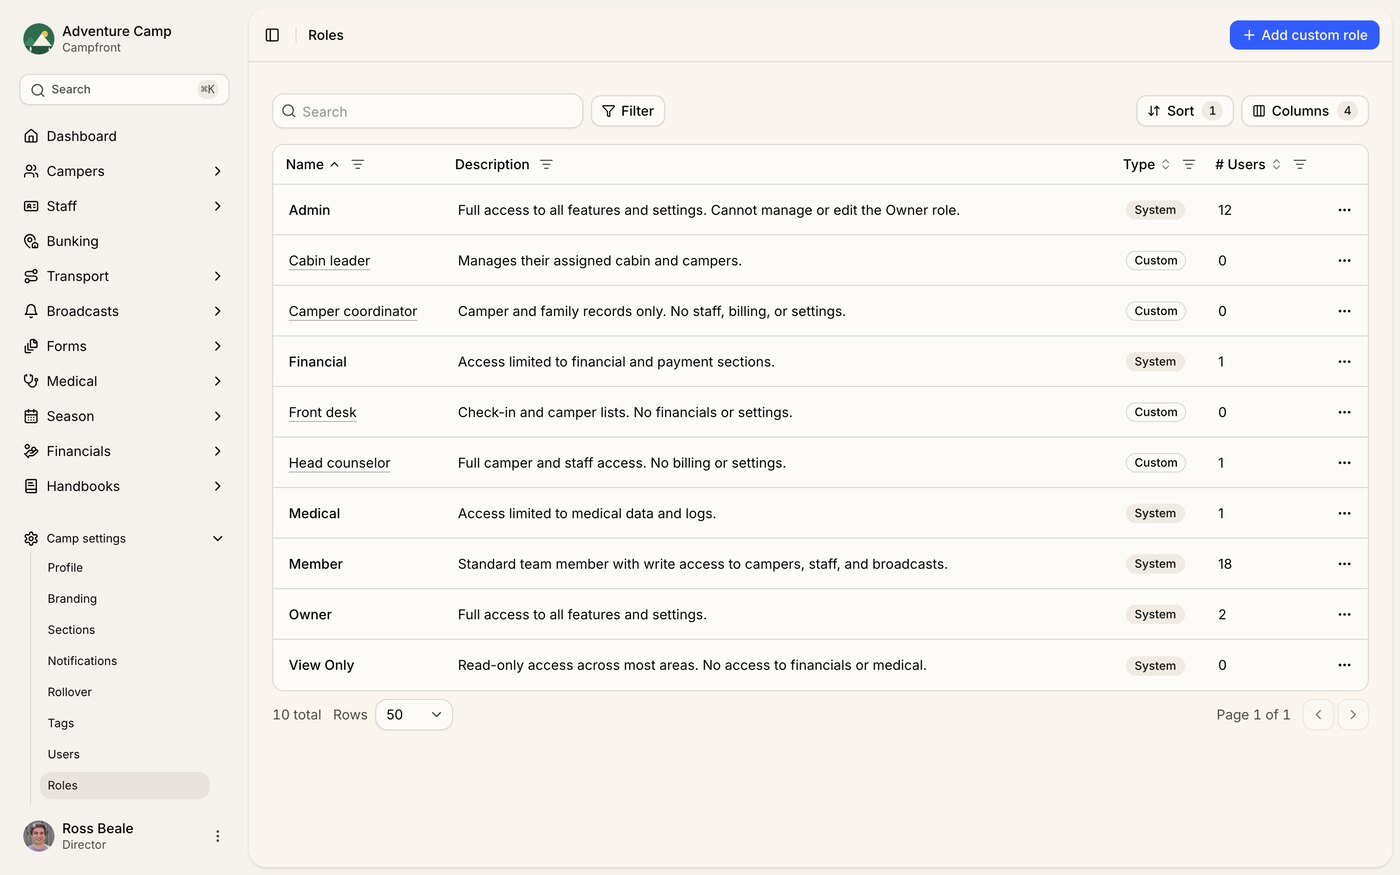
Every camp comes with a set of built-in roles that cover the most common access patterns:
Owner - full access to everything, including managing other users and roles.
Admin - full access to all features. Cannot manage or edit the Owner role.
Member - write access to campers, staff, and communications. View-only access to forms, medical, bunking, transport, and media. No access to seasons, financials, or settings.
Medical - focused access for medical staff. Edit access to medical, view-only access to campers and staff, with notes and tasks enabled.
Financial - focused access for finance teams. Edit access to financials, view-only access to campers, staff, and seasons.
View Only - read-only access across most areas. No access to financials or medical.
Built-in roles cannot be modified or deleted, ensuring you always have a reliable set of defaults.
Creating custom roles
If the built-in roles don't quite fit, you can create your own. Head to Camp settings > Roles and click Add custom role. Give it a name, set feature access levels and capabilities, and save.
Custom roles can be edited or deleted at any time, as long as no users are currently assigned to them. One exception: if a role is set as your camp's default (under Camp settings > Security), change the default before you can delete it.
Inviting team members
To add new admin users, go to Camp settings > Users and click Invite users. Add each person's name and email, choose one permission role for the whole group, and optionally include a message. Everyone gets an email with a link to set up their account.
Changing a user's role
From Camp settings > Users, find the user and update their assigned role. The change takes effect immediately - their navigation and available actions will reflect the new permissions on their next page load.
Default role
You can set a default permission role for your camp under Camp settings > Security. When new team members are invited or join your instance using single sign-on, this role will be pre-selected, saving you a step during onboarding.